Many of us experience periods when our hair feels brittle, sheds more than usual, or simply struggles to grow at the desired pace. The sight of dull strands in the mirror or excessive hair on our brush can be disheartening, impacting our daily confidence. The excellent news is that common kitchen staples, like onion and garlic, are celebrated in many hair care routines for their remarkable natural properties. And here’s a bonus: by the end of this guide, I’ll share a simple trick to minimize the characteristic scent, making this natural remedy even more practical and enjoyable.
Why Onion and Garlic Are Valued in Hair Care
For centuries, across numerous cultures, onion and garlic have been incorporated into hair care traditions. Their popularity stems from their rich composition of natural compounds. Red onions, in particular, are abundant in sulfur, a vital mineral the body utilizes to produce collagen and keratin—two proteins essential for robust hair structure. Research, such as a study published in the Journal of Dermatology in 2002, explored the application of raw onion juice on individuals with alopecia areata, observing positive outcomes in hair regrowth compared to a placebo.
Garlic, on the other hand, contains allicin, a potent compound released when it’s crushed. Allicin is known for its antimicrobial properties. Studies suggest that it can enhance blood circulation in the scalp, fostering a healthier environment for hair follicles to thrive. But the benefits don’t stop there…
The chosen base oil (be it olive, coconut, or castor) plays a crucial role as a carrier, helping these beneficial compounds penetrate effectively to the hair roots. Simultaneously, it delivers essential nourishment and hydration to your strands.
Ingredients You’ll Need
This recipe is straightforward, utilizing items you likely already have at home:
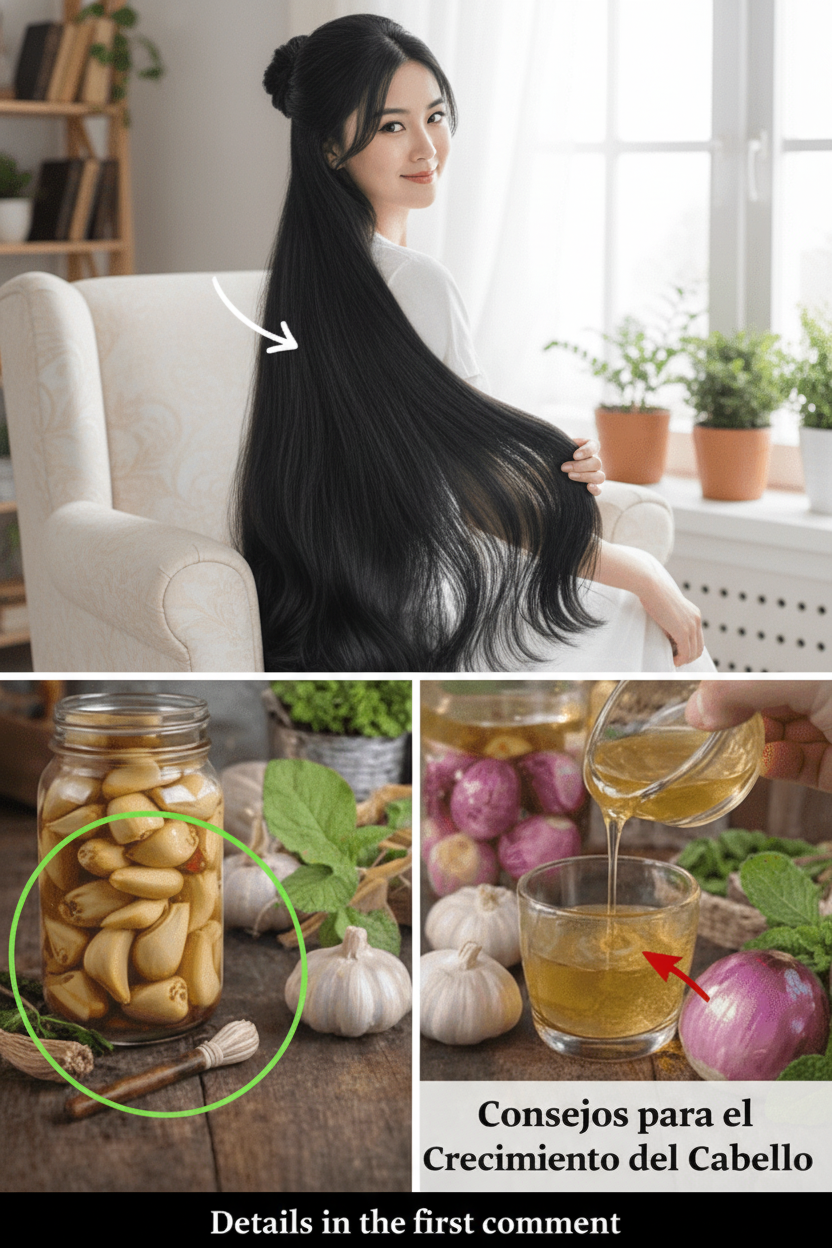
- 1 large red onion (red varieties typically offer more antioxidants)
- 1 entire head of garlic
- 1 cup of your preferred base oil (choose from olive, coconut, or castor oil)
- Optional for added potency:
- 1 fresh sprig of rosemary
- 5 whole cloves
Choosing Your Ideal Base Oil: A Quick Comparison
| Oil | Key Properties | Texture | Best For |
|---|---|---|---|
| Olive Oil | Rich in Vitamin E and antioxidants | Light | All hair types |
| Coconut Oil | Deeply penetrates, intensely moisturizes | Medium | Dry or damaged hair |
| Castor Oil | Viscous, high in ricinoleic acid | Heavy | Fine or thinning hair |
Select the oil that best suits your hair’s needs or simply use what you have readily available.
Step-by-Step Preparation of Your Hair Oil
Follow these simple steps, and you’ll have your oil ready for infusion in about 10 minutes:
- Peel the garlic cloves and gently crush them with the flat side of a knife. This action helps to release more allicin.
- Peel the onion and chop it into medium-sized pieces.
- Place all the prepared garlic and onion into a clean, sterilized glass jar.
- Completely cover the ingredients with your chosen base oil.
- If desired, add the sprig of rosemary and the whole cloves.
- Seal the jar tightly and store it in a cool, dark place for 7 to 10 days. Remember to gently shake the jar daily.
- After the infusion period, strain the oil if you prefer a smoother consistency (or leave the pieces in for maximum potency).
Voila! Your homemade hair oil is ready to use.
Effective Application for Optimal Results
Proper application is crucial for maximizing the benefits of your hair oil:
- Begin with dry hair, or wash your hair the day before application.
- Divide your hair into sections and apply the oil directly to your scalp.
- Gently massage your scalp in circular motions with your fingertips for 5-10 minutes. This stimulates blood circulation.
- Distribute any remaining oil through the lengths and ends of your hair for extra nourishment.
- Cover your head with a shower cap or a warm towel and let the oil work its magic for at least 1 hour (or leave it on overnight for deeper absorption).
- Wash your hair with your regular shampoo, preferably twice, to ensure all oil is thoroughly rinsed out.
- Repeat this treatment 2-3 times per week. Consistency is the key to noticeable results.
Practical Tips for Enhanced Results and Reduced Odor
Here are some valuable tips that many users have found beneficial:
- Always perform a patch test on your forearm 24 hours beforehand to rule out any skin irritation.
- To minimize the scent: Add 10 drops of lavender or peppermint essential oil to the finished product in the jar.
- Complement your hair treatment with a diet rich in biotin, zinc, and protein (e.g., eggs, nuts, spinach).
- Avoid excessive heat styling (blow dryers, flat irons) on the days you apply the oil.
- If you have a very sensitive scalp, consider diluting the homemade oil further with more of your chosen base oil.
This routine not only nurtures your hair but also offers a relaxing moment of self-care.
Variations to Customize Your Recipe
Eager to experiment with different approaches?
- Quick Version: Blend the onion and garlic, strain the juice, and mix it directly with your base oil. Use immediately for a fresh application.
- Intensified Version: For enhanced potency, consider adding 1 tablespoon of fenugreek seeds or black seeds (nigella sativa) to the initial infusion process along with the onion, garlic, rosemary, and cloves.